33 Free Simple Javascript Image Slider Javascript Overflow
JavaScript Image Slider Learn the Steps to create Image Slider
In this quick tutorial, we will build this type of simple and universal JavaScript slider. You will build this slider in a few minutes. And, you can use it for any type of content you want. Let's have some fun! Take a look at the demo on Codepen. The code for this tutorial is also available to download on Github.
JavaScript Image Slider Download
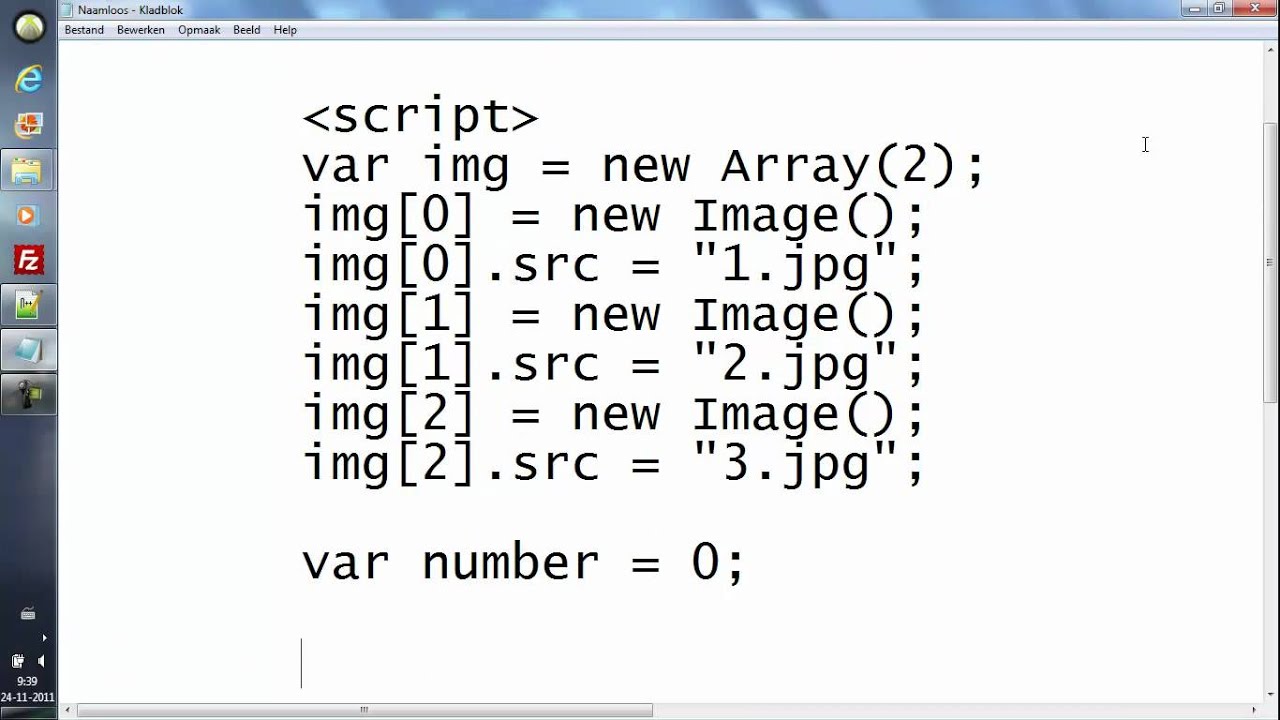
There are a few ways to make an image slider in JavaScript. One is to add the images using the css background property, and have a separate class for each image. Another way is to have just have one slide, and change it's background image directly with JS. However, the approach we'll take here is to use an img element inside each slide, like this:

20+ Simple JavaScript Slider Design Examples OnAirCode
Javascript Slider Tutorial - Easy and Fast! - YouTube Develop fully responsive Javascript Slider in an easy and fast way. Just watch the video to learn how to do this!You'll find more.

How To Create Image Slider Tutorial step by step using Html, CSS and JavaScript Code Download
20. HTML 5 with Webforms 2 provides an which will make the browser generate a native slider for you. Unfortunately all browsers doesn't have support for this, however google has implemented all Webforms 2 controls with js. IIRC the js is intelligent enough to know if the browser has implemented the control, and triggers.

25+ JavaScript Slider Code Examples OnAirCode
Explore the step-by-step tutorial on creating a dynamic and responsive image slider using HTML, CSS, and JavaScript. Learn to implement navigation buttons, a modal for image enlargement, and discover answers to common questions about image sliders. Elevate your front-end skills with this beginner-friendly project in the JavaScript Projects for Beginners Series.

20+ Simple JavaScript Slider Design Examples OnAirCode
Splide is a flexible, lightweight and accessible slider written in TypeScript. It helps you to create various kinds of sliders by just changing options, such as multiple slides, thumbnails, nested sliders, vertical direction and more. Also, you can enhance the slider capability by using APIs or building extensions. Written in TypeScript

How to Create Your Own Javascript Image Slider Tutorial (Step By Step)
In this post we'll look at how to make a simple carousel with HTML, CSS and JavaScript. We will use good code practices, keep accessibility in mind and also consider how we can test the carousel. The carousel will be a "moving carousel". Slides will move in from left to right, or right to left, with a transition.

Carousel slider tutorial with HTML, CSS and JavaScript Programming Duck
Slider. Drag the blue thumb with the mouse and move it. When the mouse button is pressed, during the dragging the mouse may go over or below the slider. The slider will still work (convenient for the user). If the mouse moves very fast to the left or to the right, the thumb should stop exactly at the edge. Open a sandbox for the task.

33 Free Simple Javascript Image Slider Javascript Overflow
Demo/Code. 13. Simple Elegant Responsive Pure CSS3 and JavaScript Slider with Carousel. This is an awesome, Simple JavaScript slider with a carousel effect created by Rizky Kurniawan Ritonga, a CodePen client. This slider accompanies five slides. Every one of them has great images and vivified texts.
Javascript tutorial 5 Image slider YouTube
There are lots of tutorials on how to make a slider in javascript and in numerous frameworks but, sometimes, we don't have to spend so much time going about adding a simple slider feature in our web page. Hence, this tutorial will give you the quick and simple way to go about making a slider. Yeah.and we are going to be using a plugin for this.

20+ Simple JavaScript Slider Design Examples OnAirCode
This tutorial will walk you through building an image slider using the jQuery library. This tutorial will have four parts: HTML SCSS JS References HTML We will be using Bootstrap for this tutorial to keep things looking good, without spending a lot of time. Our structure will be as follows: